
Jekyll + Domain + Github = Blog 💖
Hi there!
There was no post at lunch time today because I spent my lunch break finishing the setup of this blog on Github Pages. 🎉🎉🎉 When I told an old friend of mine how simple and fast that went, he just said something along the lines of “why don’t you just blog about it?” Well, here it is!
Overview
All in all, when I subtract the time it took me to convince my Mac to properly install Ruby gems even though rubygems.org wasn’t reachable via IPv6, set up a local Jekyll environment, and decide on a name, it took me between 60 and 90 minutes to set up. I’m still kind of a noob when it comes to setting up stuff outside of company networks. And because I configured some things that weren’t completely necessary, I expect that setting up this whole thing should take you no more than 30 to 45 minutes if you have access to a computer with a terminal you can work with comfortably.
Step 0: Decide On A Domain
Every blog needs a name, right? Usually I go with temporary first names and fix broken ones later in order to avoid analysis paralysis. But a domain is usually acquired for the duration of a year or more, so I decided to spend some time on choosing a name this time. Most blog ideas in my head hatch during my first four work hours of the day and I’ve spent quite some lunch breaks transferring thoughts from my head into the StandardNotes app on my work notebook. So I checked whether lunchbreak.dev was still unclaimed, looked for a cheap-yet-trustworthy domain registrar, picked one, and was very happy with the look of the domain in my browser’s URL bar. I’m rarely completely happy with names I pick, but this was one of those times! ![]()
Step 1: Create A Github Pages Repo
I really like the look of the Minimal Mistakes Jekyll Theme and it seems to be well-supported, so I decided on that, stumbled upon the very handy theme starter, and essentially started from there. Should you also choose to do that, and don’t have a Github Pages page yet, just use <your-github-username>.github.io as the repo name and substitute <your-github-username> with your actual Github username. Github recognizes that and automatically takes care of exposing the content of that repo to the web in a controlled manner.
More info on this step: Github Pages Docs
Step 2: Take A Look At Your Repo
If you used the theme starter from above, your repo structure should look similar to this:
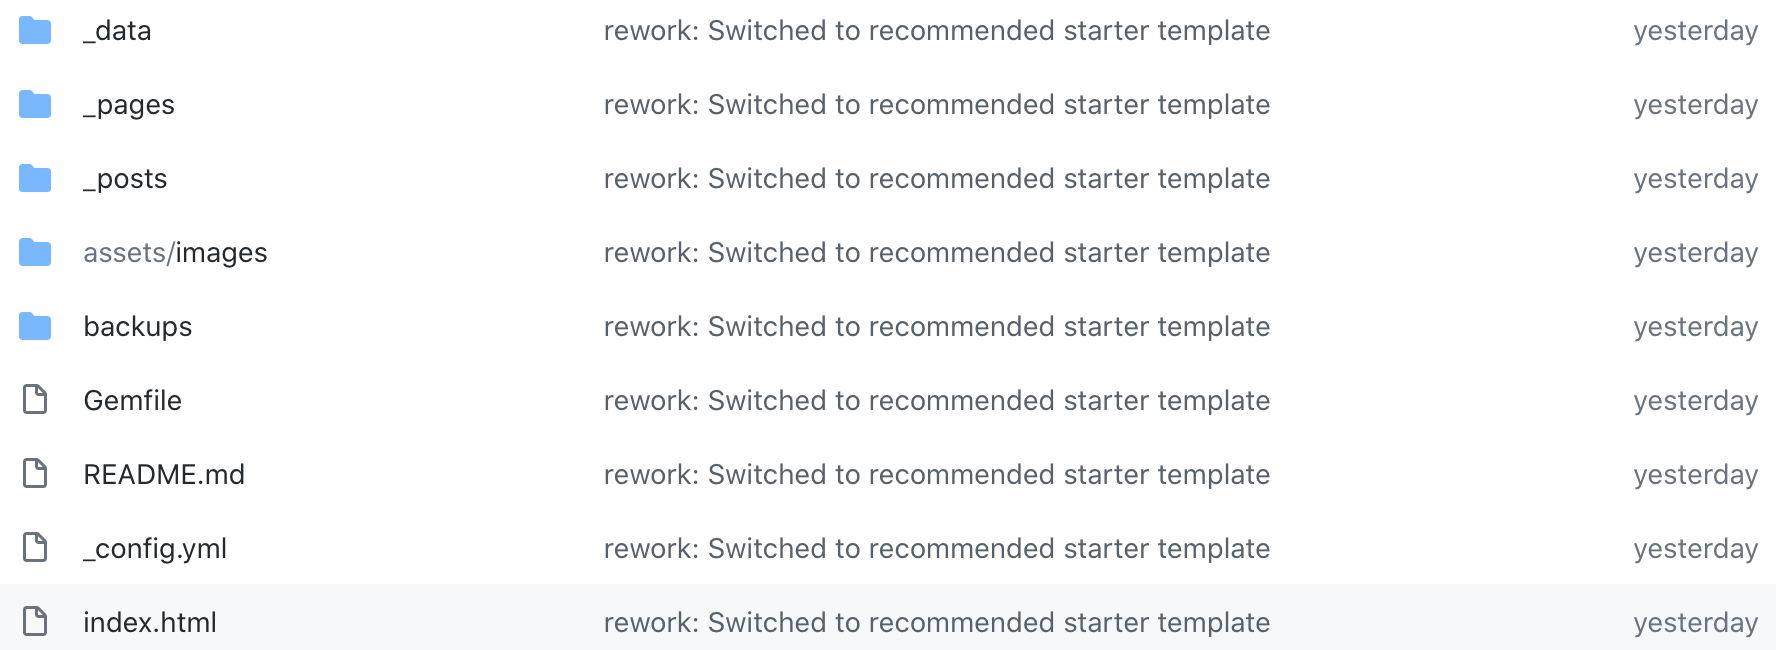
Basically, all your posts are separate Markdown files in _posts, your pages are Markdown files in _pages. The latter are sub-pages of your blog that can be reached via the headers in the top right corner after adding them to the _data/navigation.yml file:
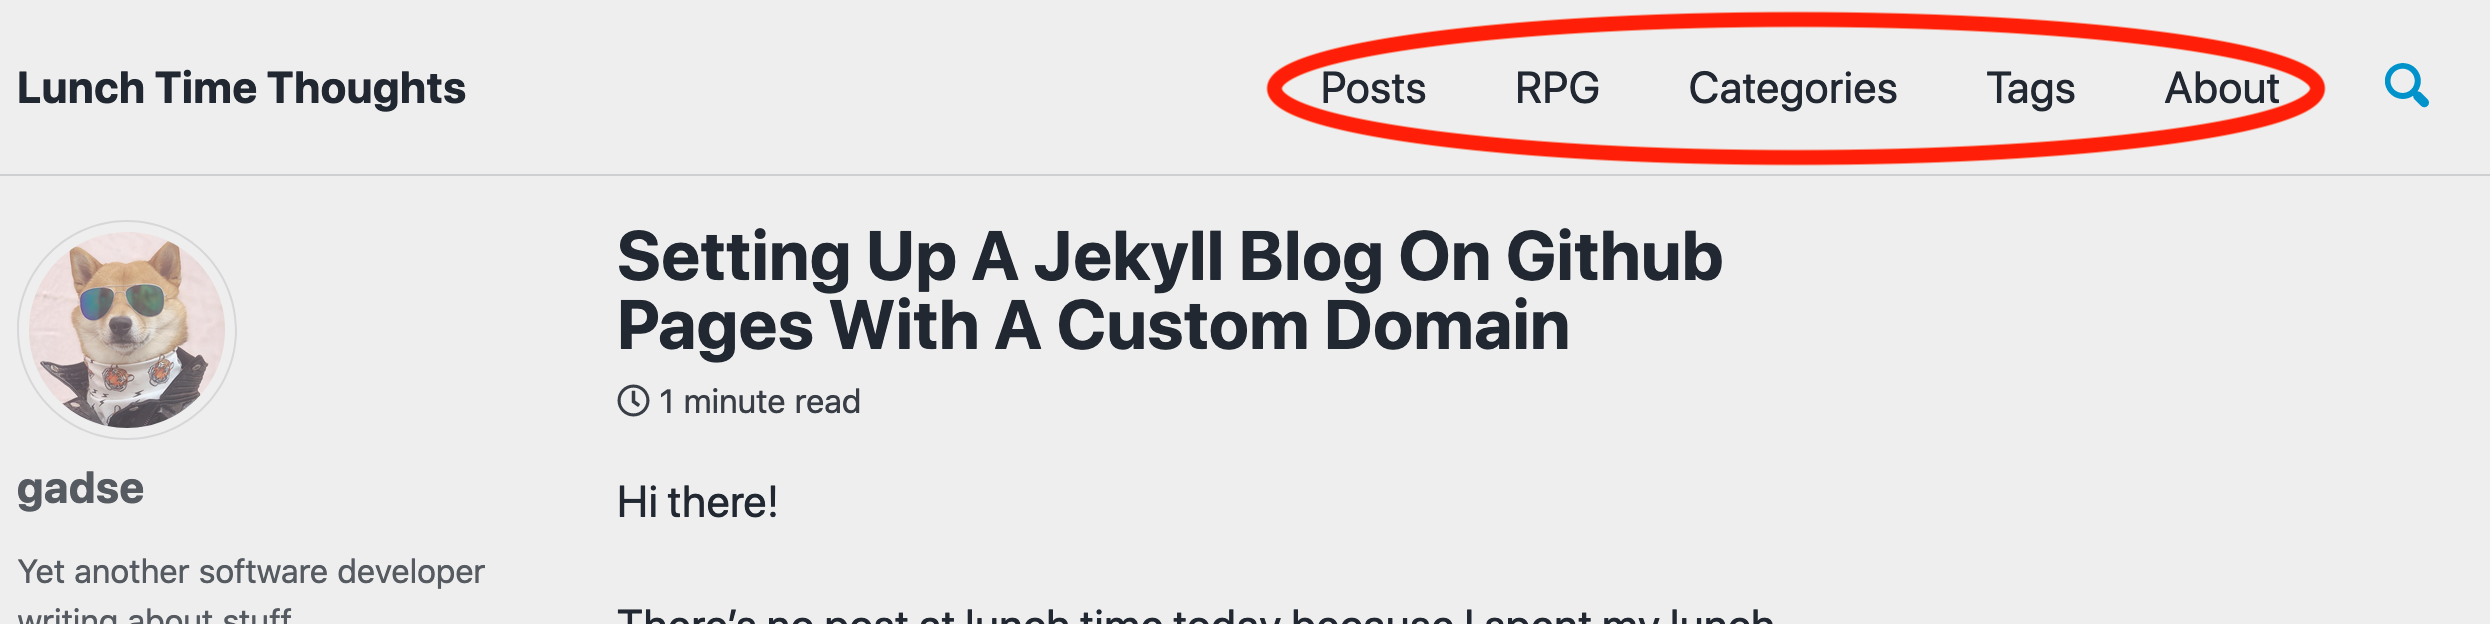 As you might notice, I added a page called “RPG” to the ones that are set up by default. You can add pages to
 _pageswithout adding them to the navigation.yml, but then your page will only be reachable directly via its URL. This can be handy if you want only a few select people to know about a page, but don’t rely on that as web crawlers are a thing and because that page’s Markdown file is still right there in your repo.
I put my images into assets/images, but that location is not as important as the previous two directories. Your blog title, bio, theme skins, and more can be configured in the _config.yml. At the time of writing, this blog uses the “air” theme. In a completely basic Jekyll blog, the root/landing page of your blog is defined by the README.md, but this Jekyll theme is a teeny tiny bit different.
So now you know to put your posts into _posts and your pages into _pages(and maybe into navigation.yml).
Step 3: Connect Your Custom Domain And Github Page
This last step was actually way easier than I imagined beforehand. After purchasing/renting/acquiring your domain, go to your domain registrar’s configuration page and add an ALIAS record answering with <your-github-username>.github.io. In my case, this looks like this:

Afterwards, you can set up your new domain name in your page’s Github repo. Open the repo settings, enter your custom domain, and don’t forget to click Save. If you chose a .dev domain, the custom domain section of the settings page could warn you about an incorrectly configured domain or at least that setting up this custom domain could take a few minutes. This is due to .dev domains enforcing and requiring working SSL certificates. During this time period, your browser should warn you about accessing your blog with the domain name you’ve chosen because the certificate exposed by Github doesn’t match your new domain yet. In my case, it took Github about 10 minutes and my blog was reachable via lunchbreak.dev.
More info on this step: Github Pages Docs
That’s it!
You now have a working minimalistic blog you can adapt and expand to your heart’s desire. You can add posts on your machine and edit them there with your favorite editor, or you can simply use Github’s online editor for text files. You can also add your own pages like I did with my RPG page, to add a lot more functionality to your blog page other than “just” blogging. I use it to keep the most important info for my RPG group(s) accessible at all times. Maybe I’ll add a Recipes page, too. Who knows? 😄
You’ll notice that the blog doesn’t feature comments. This is another reason I chose this Jekyll theme, as I don’t want to have to deal with comments at the moment. I think as soon as I feel sufficiently comfortable working with this blog’s Jekyll theme, I’ll look for a way to add a comment function.
More info on Jekyll: https://jekyllrb.com/